Working with Images
Introduction
The Stoner.Image package provides a means to carry out image processing functions in a smilar way that Stoner.Core and Stoner.Data and
Stoner.DataFolder do.
ImageFile
In the Stoner package, a ImageFile represent a single image along with associated metadata from when the image was taken.
The actual image data is stored in the ImageFile.image as a 2D numpy array. This is actually a masked array - the mask is
useful for ignoring certain portions of the image when carrying out operations. As well as the image data, a ImageFile also
has a ImageFile.metadata attribute that stores the associated image metadata as a set of key-value pairs in a dictionary.
As with Stoner.Data, ImageFile has a rich array of methods that can carry out different image analysis tasks -
in common with the philosophy of the Stoner package, these methods operate in place and also return the modified ImageFile
allowing a sequence of operations to be completed by chaining the method calls together.
The array of methods available to a ImageFile is particularly rich as the class automatically wraps functions from the
popular scikit-image package (skimage) as well as the scipy.ndimage module. In general such functions take an image as their first argument
and ImageFile passes its own image data as that argument to whatever function is being wrapped. If the function Returns
image data of the same size that the original image, then the wrapper replaces the ImageFile’s image data with the new
image data.
As well as the wrapped scikit-image and scipy.ndimage functions, ImageFile provides a set of its own functions for
carrying out some common image processing operations.
By default ImageFile can load and save both .tiff and .png files and will embed its metadata into custom tags in those
formats.
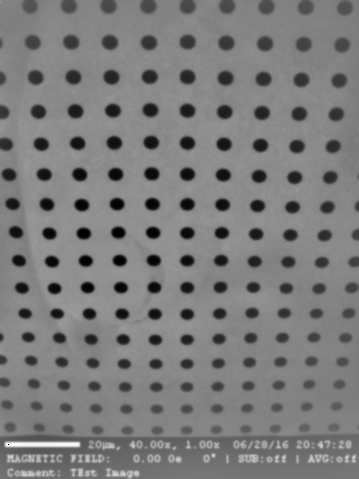
Subclasses of the ImageFile are provided for reading the .png files produced by the CM group’s Evico Kerr Microscopes as well as
a Stoner.HDF5.STXMImage class that reads the SLS Pollux Beamline’s STXM images.
Loading an Image
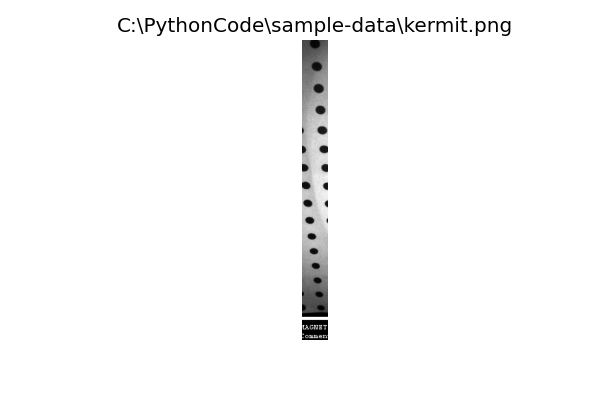
The ImageFile constructor supports taking a string argument which is interpreted as a filename of an image format recognised by PIL. The resulting
image data is used to form the contents of the ImageFile.image which holds the image data.:
from Stoner import ImageFile
im = Image.ImageFile("kermit.png")

Like Stoner.Data ImageFile supports image metadata. Where this can be stored in the file, e.g. in png and tiff images, this is read in
automatically. This metadata is stored as a Stoner.Core.typeHintedDict dictionary. This metadata can be set directly in the
construction of the ImageFile:
im = ImageFile(np.arange(10000).reshape(100,100), metadata={'myarray':1})
Examining and manipulating the ImageFile
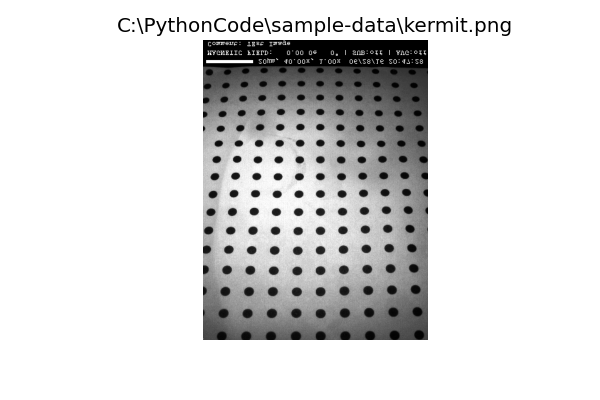
IF you are using an ipython console or Jupyter Notebook, then the ImageFile supports rich format outputs and
it will show you a picture of the image data as its default representation.
ImageFile Attributes and Properties
The key attributes and properties of the ImageFile are:
ImageFile.image:This is the actual numpy array of data that is the image.
ImageFile.metadata:This is the dictionary that contains the metadata associated with the image. This is normally parameters and information about the measurement or data that is encoded within the the measurement file, but can be supplemented by information added by the user directly or by methods and functions. Each item of metadata is normally referred to by a string key.
ImageFile.filename:This is the name of the file from which the image was loaded (as a string). It is also used as a default title when displaying the image.
ImageFile.mask:This represents the mask data for an image file. By default it is entirely False, meaning all parts of the image are visible. It supports a variety of different ways of manipulating which parts of the image are masked - see the section below.
ImageFile.draw:THis is a special attribute that lets you draw simple geometric shapes on the image.
:class:`ImageFile`s use the appropriate data type for the underlying image format - integers for png and either integers or floating point numbers for tiffs (STXM files are always floating point).
The ImageFile.convert() method can be used to convert the data to a more appropriate format:
im.convert(float)
im.asfloat()
im.asint()
It also has simpler ImageFile.asfloat() and ImageFile.asint() methods for converting to floating point or integer
formats as required.
There are a number of other attributes that can tell you information about the ImageFile such as:
ImageFile.centre:the coordinates of the centre of the image
ImageFile.aspect:the image aspect ratio
ImageFile.shape:the size of the underlying numpy array for the image.
To make it easier to quickly get a rotated image, the attributes ImageFile.CW and ImageFile.CCW return
copies of the ImageFile that are rotate 90 degrees clockwise and counter-clockwise.
In many cases the default behaviour of modifying the image data in place may not be desired - to get a copy of the
ImageFile you use the ImageFile.clone attribute:
new_im = im.clone.gaussian(4.0) # create a copy of im and then apply a gaussian blur

An ImageFile can be indexed like an array to return a new ImageFile object which contains only a subset
of the original image data.:
im[:,10:50] # Return a vertical section of the image
im[::-1,:] # Flip the image vertically
Indexing an ImageFile with a string will instead access the metadata stored with the object.:
im["Loaded as"]
>>> 'KermitPNGFile'
The ImageFile inherits from a dictionary like class - so all the usual Python dictionary methods work on the
metadata of the image.:
for metadata_key in im:
    print(f"{key}->{im[keuy}")

averages = im.pop("Averages",1)
if "Message" in im:
    orint(f"Message = {im['Message']}")
Like the Stoner.Data class, the metadata dictionary will fall back to matching keys with regular expressions
if not exact match is found. In this case, if multiple metadata items match then the result of indexing with a string
may return a dictionary with all the matching keys.
The metadata associated with an image will always be stored in the best Python type that can be found - where possible metadata is stored in files with a hint as to the native type of that data and this type hint is used to map to an appropriate Python type. Unmappable types are retained as a string representation.
Common Functions
It is not possible to provide an exhaustive guid to all the functions made available from scikit-image, scipy.ndimage and opencv2, but this section will cover some of the commonly used functionality.
Specify a box
Many of the functions can be used with a _box parameter to limit their operation to a specified region of the image.
Additionally the ImageFile.crop() method will discard the image outside a region specified in a similar way. The
working box can be given as follows:
- A single integer:
This is interpreted to exclude a region of n pixels from all sides of the image.
- A single floating point number between 0.0 and 0.5:
This is interpreted to exclude this corresponding fraction of the width and height from each side of the image
- A tuple of 4 numbers, or 4 arguments:
This is interpreeted as a sequence of pxiel coordinates for (left-x, right-x, top-y, bottom-y). If any of the numbers are None, then this is take as the minimum or maximum extents of the width or height (depending on whether the None value substitutes for the left, right top or bottom coordinate).
- A single string:
The argument is interpreted as the name of a metadata item that will define the box to be used.
- A sigle value False:
This is equivalent to the whole image (i.e. to not specify a box)
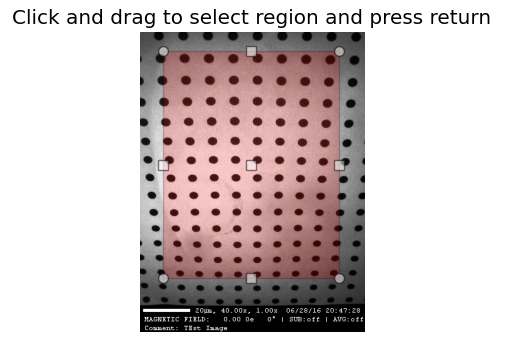
- A single None value:
In this case a copy of the image is shown to the user and they are invited to draw the box with the mouse and then press the <Enter> key to confirm their selection.
Aligning Two Images
The Stoner.ImageFile.align() method can ve used to align an image to a reference image. It offers a variety of different
algorithms which may be better or worse depending on the nature of the image. The options are:
- chi2_shift:
this uses the image-registration module to carry out a chi-squared analysis of shifting the two images relative to each other.
- imreg_dft:
this uses the imreg_dft module to carry out the image registration. In essence it takes a fourier transform of the two images and then compares the phases within the fourier transforms to calculate the necessary shift.
- scharr:
this is the default method used. It first of all applies a Scharr edge detection filter and uses the imreg_dft method to find the translation vector.
- cv2:
this method uses the opencv2 package’s alignment algorithm.
Align also takes a _box keyword parameter to confine the section of the image used for the alignment to a specific region (this can make the operation more efficient if much of the images are featureless), and a scale parameter that will upscale the image before attempting to do the alignment. This may improve sub-pixel alignment corrections.
As well as returning the shifted images, ImageFile.align() will record the translation vector used in the metadata item tvec.:
im.align(ref,method="imreg_dft", scale=4)
print(f"Translation Vector={im['tvec']}")
Align also calculates a translation-limits metadata item that represents the maximum extent of the image where the pixels have not been added to accommodate the translation for the alignment.
Cropping an Image
The ImageFile.crop() will crop the image to the box you specify. If called with no parameters, then it will show the current
image and allow you to draw the crop box on it. Pressing return will select the region to crop.
The combination of the translation_limits metadata item from the ImageFile.align() method and the specification of the box
for cropping allows images to be aligned and then cropped to match.:
im.align(ref,method="imreg_dft", scale=4)
# Crop the image according to the translation limits worked out be align.
im.crop("translation_limits")

# Now crop the reference image, using the revsed translation limits
ref.crop(im.translation_limits("tvec", reverse=True))
Contrast Normalisation
If the absolute value of the image data is not important, then normalising the image can improve the contrast. The
ImageFile.normalise() will do this.By default it will remap the image intensity values to the range -1 to +1. This
can be changed with the limits keyword parameter. The area of the image used to calculate the mapping between the old and
new intensity values can be set with the sample parameter. If there are a few pixels with extreme values in the image then
this can reduce the contrast for the bulk of the image. By using the limits parameter you can restrict the portion
of the input range to be rescaled over. For example, limits=(0.1,0.9) will map the first 10% and the last 10% of the
pixels to -1 or +1 and the middle 80% between the two extremes.:
im.normalise(limits=(0.01,0.99))
Image Filtering
Filtering is frequently used to remove npise and other artefacts from images. Most of the filters that can be applied are functions within the sckit-image.filters module. A good general purpose option is to use a gaussian filter - this will convolute the image with a 2-D gaussian function with a user-definable width. This is effective for removing high frequency noise and speckle.:
im.gaussian(1.0)
For band-pass filt4ering the scikit-image.filters method difference_of_gaussians can be used. This filters the image with two different gaussian blurs and then takes the difference between them - the smaller gaussian blur removes high frequency noise whilst the large gaussian removes low spatial frequency variations.:
im.difference_of_gaussians(1.0,2.0)
Another filtering approach is to us a Savitsky-Golay filter - this fits a polynomial surface locally over the data to smooth or differentiate the date. This sort of filtering is good for preserving feature sizes in the original data set.:
im:sgolay2d(pints=5)
Fourier transforms
Fast Fourier transforms are oftern used when we need to examain the frequency spectra of image data. The ImageFile.fft()
method provides a convenient one-stop method for generating the fft that can also take care of some of the artefacts that
can result.:
fft=im.clone.fft(replace_dc=True, window="hamming")

In this example, a copy of the image is transformed to the mangitude of its fourier transform. THe fourier transform is shifted so that the central pixels are the 0-ffrequency componennts. The optional keywrod remove_dc replaces the 0 frequency data with the mean value of the FFT to avoid a large spike int he FFT from the mean value of the image. The window parameter tells the method to multiply the image by the corresponding window function (from scikit-image.filters.window) before calculating the FFT. This avoids artefacts caused by the discontinuities at the edges of the image.
The shifting of the FFT to align the dc componentns to the centre of the image can be controlled with the shift keyword parameter, whilst the output is controlled by the phase parameter - False gives the magnitude, True returns the phase angle in radians and None returns the full complex FFT.
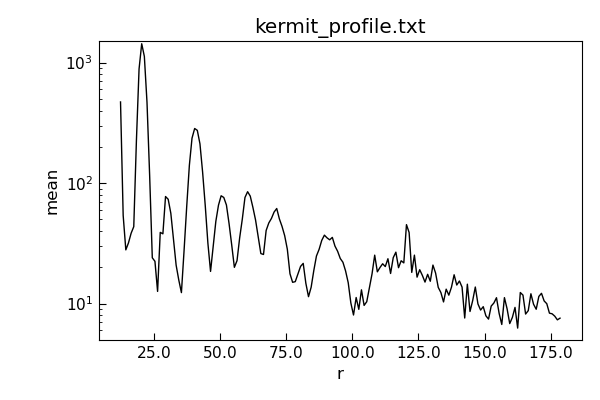
To aid with analyhsing radial distributions in FFTs (or images), the ImageFile.radial_profile() method can be used.
This will compute a profile from a given centre outwards - either integrating over all angles, or restricting to specific angles.
At its simpletst one can just do:
profile=fft.radial_profile()
Which will return a Stoner.Data object with columns for the radial distance, mean pixel value at the corresponding radius,
standard deviation and number of pixels counted. The optional angle keyword parameter will select either one angle (float) or a
rangle of angles (tuple of two floats). This can be easily plotted since the Stoner.Data object is created with the
appropriate columns setup as x oand y data columns.:
fft.radial_profile(angle=(-0.04,0.04)).plot(plotter=semilogy)
Further functions
Further functions that could be useful:
- im.threshold_minmax(0.2,0.8)
Returns a binary image
- im.plot_histogram()
Plot a histogram of the pixel intensities
- im.level_image()
Flatten a skewed image background
- im.subtract_image(otherim)
Subtract another image and enhance contrast
- im.align(otherim)
Translate image to line up with other im
Scikit-Image & scipy.ndimage Functions
While many local analysis functions have been added to ImageFile one of the big benefits is that function proxy methods have been added to make the entire
scikit-image library and scipy routines available. Function requests will first search local image functions and secondly look up any function from the external
libraries. The proxy will pass the ImageFile.image attribute as the first argument to any external call to a scikit-image or scipy function. The return value for such
calls is handled a bit carefully:
- If the return value is a 2d numpy.ndarray like type that has the same size as the original, or if the _ keyword argument is set to True then the original
ImageFile.imageis replaced with the returned result.If the return value is anything else then it is simply passed back to the calling program.
In this way, many operations can be carried out ‘in-place’ on a ImageFile. For example:
ImageFile Representation
By default, the representation of an ImageFile is just a short textual description, however if the short_repr& and *short_img_repr options are both set to False and a graphical console is in use with an ipython kernel, then th special _repr_png_ method will show a picture of the contents of the ImageFile instead.:
i = Stopner.Image.ImageFile("kermit.png")
i
>>> kermit.png(<class 'Stoner.Image.core.ImageFile'>) of shape (479, 359) (uint16) and 53 items of metadata
from Stoner import Options
Options.short_repr=False
Options.shoft_img_repr=False
i
>>>
Alternatively the ImageArray.imshow() method (accessible to ImagerFile) will show the image data in a matplotlib window.
ImageArray: A numpy array like class
Somewhat analogous to Stoner.Core.DataArray, the ImageArray is a specialised subclass of numpy.ma.MaskedArray used to
store the image data in ImageFile. The numpy.ndarray like data can be accessed at any point via either ImageFile.image or ImageFile.data
and will be accepted by functions that take an numpy.ndarray as an argument.
Working with Lots of Images: ImageFolder and ImageStack
Just as Stoner.DataFolder allows you to efficiently process lots of separate Stoner.Data files, ImageFolder does the same for lots
of ImageFile files. It is based on the same parent Stoner.Fodlers.baseFolder class - so has similar abilities to iterate, form into
sub-folders and so on. In addition, an Imagefolder has additional attributes and methods for working with multiple images.
Due to the potentially large amount of data involved in processing images it is good to take advantage of native numpy’s speed wherever possible. To this end
Stoner.Image.ImageStack is now available. This works very similarly to ImageFolder but internally represents the image stack as a 3d numpy array.
For example:
imst = ImageStack('pathtomyfolder', pattern='*.tif') #directory is held in memory but images are not loaded yet
imst = imst['subfolder'] #take advantage of :class:`DiskBasedFolder` grouping abilities
imst.translate(5,3) #instantiate the stack and translate all images
You can request and manipulate this 3d array directly with the imarray property, alternatively you can ask for any function accepted by the underlying ImageFile (including the scikit-image and scipy library).